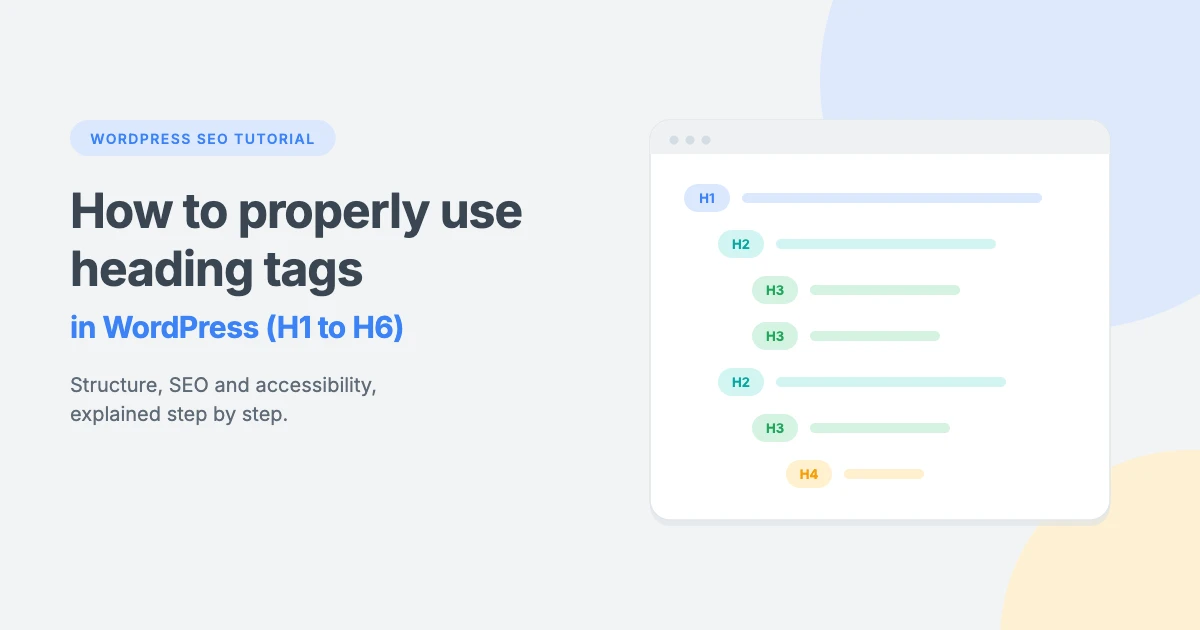
Heading tags look like a simple formatting choice, but they do a lot of work behind the scenes. They tell search engines what each part of your page is about, help screen reader users move around your content, and make long posts easy to scan. When heading tags in WordPress are used badly, with several H1s, skipped levels or headings picked only for their size, your content becomes harder to read and harder to rank.
In this tutorial, we’ll explain what heading tags are, how H1 to H6 should fit together, and how to add and edit heading tags in WordPress using the block editor, the classic editor and HTML. We’ll also show you how to check your theme’s heading structure, style headings without breaking the hierarchy, and optimize them for SEO with Rank Math.
What are heading tags?
Heading tags are HTML elements that mark the titles and section headings on a web page. There are six levels, from <h1> (the most important) to <h6> (the least important). Browsers usually show higher-level headings in a larger font, but the real purpose of heading tags is structure, not size.
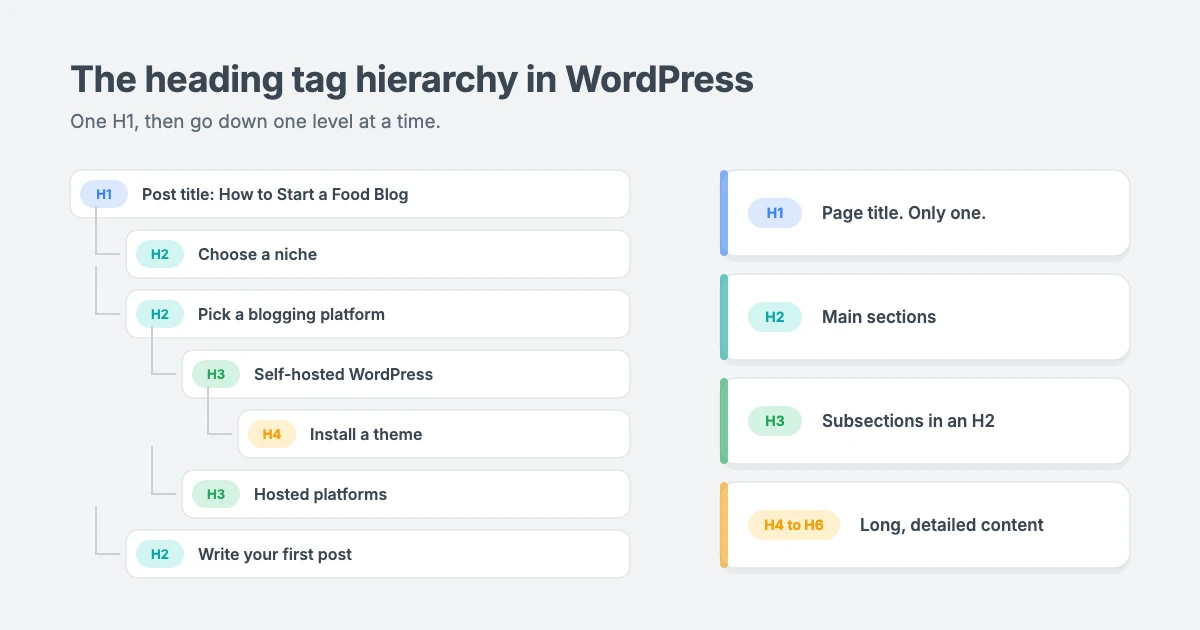
Here is what a simple heading structure looks like in HTML:
<h1>How to Start a Food Blog</h1>
  <h2>Choose a niche</h2>
  <h2>Pick a blogging platform</h2>
    <h3>Self-hosted WordPress</h3>
    <h3>Hosted platforms</h3>
  <h2>Write your first post</h2>
Think of heading tags as the outline of your page, like the table of contents in a book. The H1 is the book’s title, H2s are the chapters, and H3s are the sections inside each chapter. You don’t need to write any code to use heading tags in WordPress, because the editor adds the right tag for you.
What each heading level is for
Here is how each heading level is normally used on a WordPress post or page:
| Heading | What it’s for | How many per page |
|---|---|---|
| H1 | The post or page title | One |
| H2 | Main sections of the content | As many as you need |
| H3 | Subsections inside an H2 | As many as you need |
| H4 | Subsections inside an H3 | Only in long, detailed content |
| H5 | Subsections inside an H4 | Rarely needed |
| H6 | Subsections inside an H5 | Almost never needed |
Most blog posts only need H1, H2 and H3. H4 is useful for long guides, documentation or step-by-step tutorials with many parts. If you find yourself reaching for H5 or H6, it’s usually a sign the post should be split up or reorganized.
Why heading tags matter
Getting your heading tags right helps three groups at once: your readers, search engines and people using assistive technology.
Readability and user experience
Most visitors scan a page before they decide to read it. Clear headings let them jump straight to the part they need. A post with descriptive headings and short paragraphs feels easier to read, keeps people on the page longer and encourages them to visit more pages on your site.
SEO
Search engines use heading tags to understand the topic of a page and how its sections relate to each other. Text in headings carries more weight than body text, so a clear, relevant heading helps Google understand what each section covers. Well-structured headings can also help your content appear in featured snippets and list results. Google’s own SEO Starter Guide recommends using headings to organize content so it’s easy for people to follow.
Accessibility
Screen reader users often navigate a page by jumping from heading to heading, much like sighted users scan. If the heading levels are in a logical order, they can understand the page structure and find what they need quickly. The W3C’s guide to page structure and headings explains why skipped or misused heading tags make pages harder to use.
How to add heading tags in WordPress (block editor)
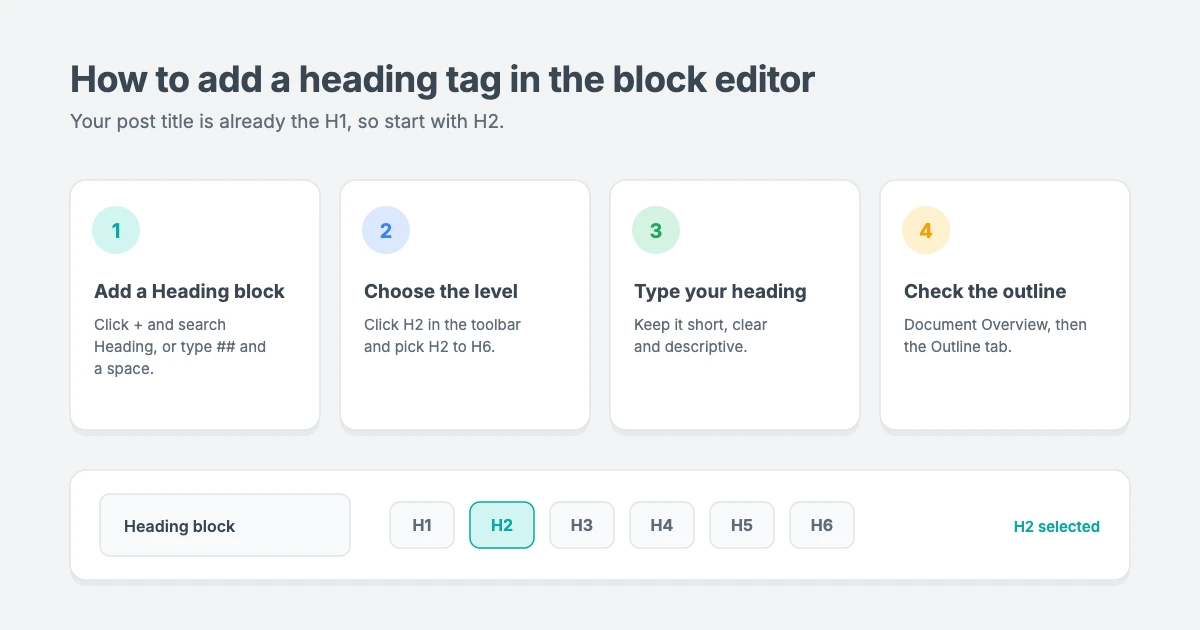
The block editor (Gutenberg) makes it easy to add heading tags in WordPress. Your post title is automatically the H1, so you’ll start your content with H2 headings.
Method 1: Add a Heading block
- Open the post or page you want to edit.
- Click the + (Block Inserter) button where you want the heading.
- Search for Heading and click the Heading block.
- Type your heading text.
By default, a new Heading block is an H2, which is exactly what you want for a main section.
Method 2: Use the slash command or Markdown shortcut
You can add heading tags in WordPress without leaving the keyboard:
- Slash command: on a new line, type
/headingand press Enter. - Markdown shortcut: on a new empty line, type
##followed by a space for an H2,###and a space for an H3, and so on. WordPress turns the line into a Heading block instantly.
Change the heading level
To change an existing heading from H2 to H3 (or any other level):
- Click the Heading block to select it.
- In the block toolbar, click the heading level button (it shows the current level, such as H2).
- Choose the new level, from H1 to H6.
You can also turn an existing paragraph into a heading. Select the paragraph, click the block type icon at the left of the toolbar and choose Heading.
Check your heading structure in the List View
The block editor has a built-in outline of your post. Click the Document Overview (List View) icon in the top toolbar, then open the Outline tab. It lists every heading on the page in order and shows its level, so you can spot a skipped level or a stray H1 at a glance.
How to add heading tags in the classic editor
If your site still uses the classic editor, you can add heading tags from the toolbar:
- Select the text you want to turn into a heading.
- Open the Paragraph dropdown in the first row of the toolbar. If you only see one row of buttons, click the Toolbar Toggle button to show the second row.
- Choose Heading 2, Heading 3 and so on.
Don’t choose Heading 1 inside the content, because the post title already uses the H1 tag.
How to add heading tags with HTML
Sometimes you need full control, for example inside a Custom HTML block or a page builder text widget. You can write the heading tags yourself:
<h2>Our services</h2>
<h3>Website design</h3>
<h3>Ongoing maintenance</h3>
In the block editor, you can also edit a single Heading block as HTML. Select the block, click the three-dot menu in the toolbar and choose Edit as HTML. To add an anchor link to a heading, open the block settings, expand Advanced and fill in the HTML anchor field. You can then link directly to that section with #your-anchor.
Best practices for heading tags in WordPress
Follow these rules and your heading structure will work for readers, search engines and screen readers alike.
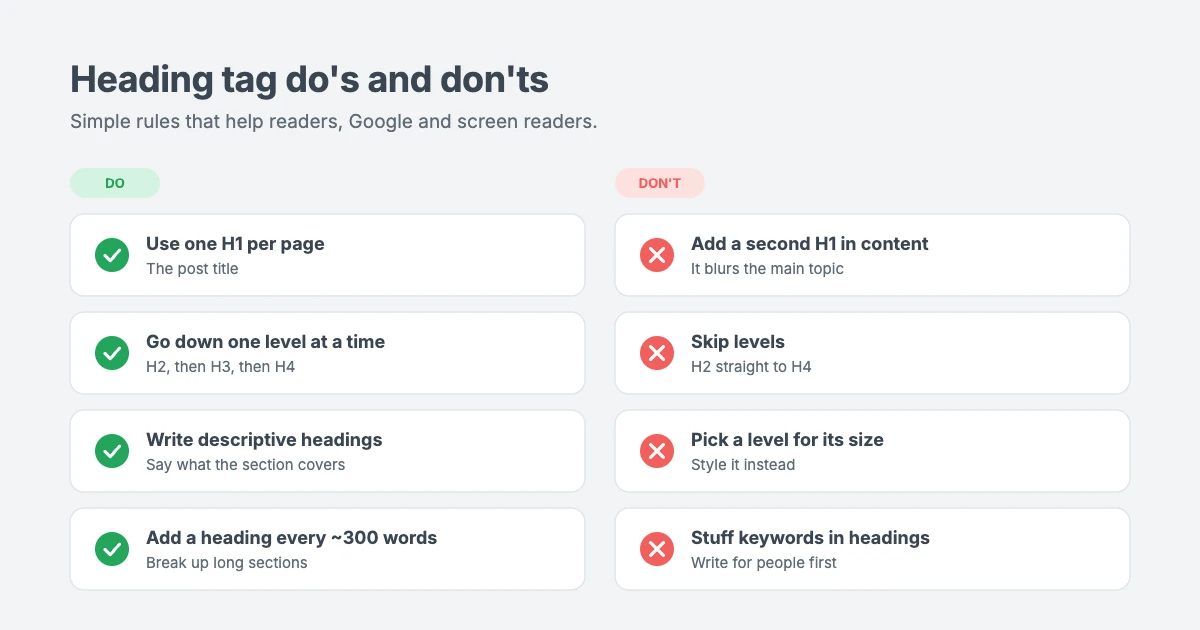
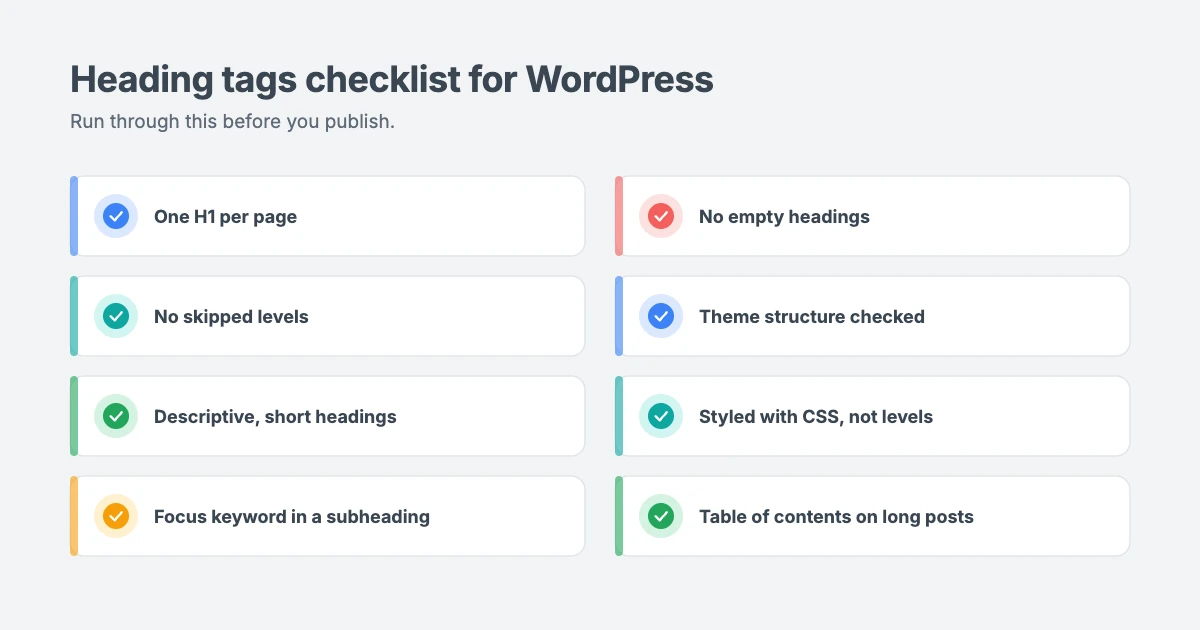
Use only one H1 per page
The H1 should describe what the whole page is about. In WordPress, the post title is the H1, so you shouldn’t add another H1 inside your content. Modern HTML technically allows more than one H1, but a single H1 is still the clearest signal for search engines and the accepted best practice.
Don’t skip heading levels
Go down one level at a time. An H2 can be followed by an H3, but not by an H4. You can go back up as far as you like, so an H4 can be followed by a new H2 when you start the next main section.
Use headings for structure, not for style
Never pick a heading level just because you like its size. If you want bigger or bolder text that isn’t a section title, use a paragraph and change its font size, or use bold text. If you want a heading to look different, change its style (we’ll show you how below) and keep the right level.
Write descriptive headings
A good heading tells the reader exactly what the section covers. “Choose the right hosting plan” is better than “Step 2” or “More info”. Clear, specific headings also make your post easier to understand in search results and in a table of contents.
Keep headings short
Aim for headings that fit on one line. Long headings are hard to scan, especially on mobile. Save the detail for the paragraph below.
Add a heading every few hundred words
There’s no fixed rule, but if you have more than about 300 words without a heading, readers start to lose their place. Break long sections into H3 subsections.
How to check your theme’s heading structure
Your content is only part of the story. Your WordPress theme also outputs heading tags in the header, sidebar, footer and archive pages. Some older themes wrap the site title or logo in an H1 on every page, so each post ends up with two H1s. Others use heading tags for widget titles, which can clutter the outline.
To check the heading tags on any page:
- Open the page on your live site.
- Right-click the page and choose Inspect to open your browser’s developer tools.
- Press Ctrl+F (or Cmd+F on a Mac) inside the Elements panel and search for
<h1. - Repeat for
<h2and<h3to see how the rest of the page is structured.
A heading outline extension for Chrome or Firefox can show the whole structure in one view. You can also use the free W3C Markup Validation Service, which has an option to show the page outline.
On a single post, you should find one H1 (the post title). On your homepage, the site title or the main headline can be the H1. If your theme adds extra H1s or uses headings for decorative text, a developer can fix it in a child theme. Our WordPress Theme Customization service can correct your theme’s heading tags without touching your content.
How to change the look of headings in WordPress
You can change the font, size, weight and color of heading tags in WordPress without changing their level. How you do it depends on your theme.
Block themes: use Global Styles
- Go to Appearance » Editor and click Styles.
- Open Typography and click Headings.
- Choose All to style every heading at once, or pick a level from H1 to H6.
- Change the font, size, line height, weight or letter spacing, then click Save.
Classic themes: use the Customizer
Go to Appearance » Customize and look for a Typography or Fonts panel. Many themes let you choose a separate font for headings and set the size of each level. The options depend on your theme.
Use custom CSS
If your theme doesn’t have heading options, you can add CSS under Appearance » Customize » Additional CSS (classic themes) or in the Site Editor’s Additional CSS panel (block themes):
.entry-content h2 {
  font-size: 30px;
  font-weight: 700;
  color: #1f2937;
}
.entry-content h3 {
  font-size: 22px;
  font-weight: 600;
}
This changes the look of your heading tags only, so your SEO structure stays the same.
How to optimize heading tags for SEO with Rank Math
Rank Math checks your heading tags as part of its content analysis. Here’s how to use it to improve your headings.
Use your focus keyword in a subheading
- Edit your post and open the Rank Math panel from the top-right toolbar.
- Enter your focus keyword in the Focus Keyword field.
- Under Additional tests, look for the check that asks you to use your focus keyword in subheadings like H2, H3 and H4.
Add the keyword to one or two headings where it fits naturally. Don’t force it into every heading. A natural, descriptive heading is better for readers and for SEO than a list of keywords.
For example, for a post targeting “best hiking boots”:
- Good: “How to choose the best hiking boots for wet trails”
- Bad: “Best hiking boots, hiking boots for men, cheap hiking boots”
Add a table of contents
A table of contents built from your heading tags helps readers jump to any section and can give you jump links in Google’s results. Rank Math includes a free Table of Contents by Rank Math block:
- Click the + button and search for Table of Contents.
- Add the Table of Contents by Rank Math block near the top of your post.
- The block lists your headings automatically and updates when you change them. In the block settings, you can choose which heading levels to include.
Aim for featured snippets
Google often builds list snippets from a page’s headings. For “how to” or “best of” content, use a clear H2 for the main question and an H3 for each step or item. Answer the question directly in the first paragraph under the heading. Use the Rank Math FAQ or HowTo blocks for question-and-answer and step-by-step content to add schema markup as well.
Common heading tag mistakes to avoid
Here are the problems we see most often when we audit WordPress sites:
- Adding a second H1 inside the content, often by copying the title into a Heading block.
- Skipping levels, such as jumping from H2 straight to H4 because the H4 “looked right”.
- Using headings for styling, such as making a call to action or a quote an H2 so it looks bigger.
- Keyword stuffing headings until they read unnaturally.
- Empty headings left behind after editing, which screen readers still announce.
- Long walls of text with no subheadings at all.
- Theme or page builder headings that wrap logos, widget titles or buttons in heading tags.
Let our team fix your heading structure
If your theme outputs the wrong heading tags or you’d like an expert to review your site’s structure, the WPInterface team can help:
- WordPress Theme Customization: we fix theme heading tags, typography and layout in a child theme, so updates don’t undo the changes.
- Custom Theme Development: a fast, accessible theme built with a clean heading structure from day one.
- WordPress Care Plans: ongoing updates, backups and monitoring, with help on the small fixes that keep your site in good shape.
- VIP Support: a $29 priority ticket for a quick, expert answer to a specific problem.
You can also see all our professional WordPress services. For more SEO fixes, read our tutorial on how to find and fix duplicate content in WordPress.
Frequently asked questions
What is the difference between H1 and H2?
The H1 is the main title of the page and describes the whole topic. In WordPress, it’s your post or page title. H2s divide the content into main sections under that title.
Should I use H1 inside my WordPress post content?
No. WordPress already uses the H1 tag for your post title, so start your content with H2 headings. Adding another H1 makes it less clear what the page is mainly about.
Do I have to use all six heading levels?
No. Most posts only need H1, H2 and H3. Use deeper levels only when a section really has subsections. The important thing is to not skip levels on the way down.
What is the difference between the H1 and the SEO title?
The SEO title (the title tag) is what shows in search results and browser tabs. The H1 is the heading visitors see on the page. They’re often similar, but you can set a different SEO title in Rank Math, for example a shorter version with your keyword at the start.
How many H2 headings should a post have?
There’s no fixed number. Add an H2 for each main section, and add H3s when a section gets longer than about 300 words or covers several separate points.
Do heading tags affect SEO?
Yes. Heading tags in WordPress help search engines understand the structure and topic of your content, and they improve readability, which affects how long people stay. They’re one of many factors, so good content still matters most.
Why does my theme have more than one H1?
Some themes wrap the site title or logo in an H1 on every page. This is usually a theme design choice. It can be fixed in a child theme or by a developer without changing your content.
Conclusion
Heading tags in WordPress give your content a clear outline that readers, search engines and screen readers can all follow. Use one H1 for the title, H2 for main sections and H3 for subsections, never skip levels, and change the look of headings with styles instead of picking the wrong level. Then check your theme’s structure, add your focus keyword to a subheading with Rank Math, and add a table of contents to long posts.
If your theme’s headings need fixing, our WordPress Theme Customization team can sort it out for you.
Reactions
How did this make you feel?
Be the first to react
One reaction per visitor. Tap again to change or remove it.



Leave a reply